How to create your own geotags and geofilters on Snapchat, Facebook, and Instagram.
 Geotags can be a really useful tool that a variety of social media sites have begun to adopt. It started on Snapchat, but has since made its way to Instagram and Facebook as well. It can be perfect for promoting a business event, or even just helping to celebrate a friend’s birthday celebration. If you’re interested in understanding how you can use geotags and geofilters, here is an easy explanation of what they are and how to use them.

How to create your own geotags and geofilters on Snapchat, Facebook, and Instagram
What are geotags and geofilters?
Facebook “check ins” are the easiest example of a geotag. Essentially, a geotag links a particular location to a social media post. Similarly geofilters are photo-filters built into Snapchat and Facebook that are location-specific. This makes both of these great for sharing your location with friends and family on these social media sites.
How to create a geofilter on Snapchat
Snapchat makes it pretty easy to create geofilters, which makes sense since they were the ones to start the trend. The first thing you want to do is go to their create your own filter/lens site.
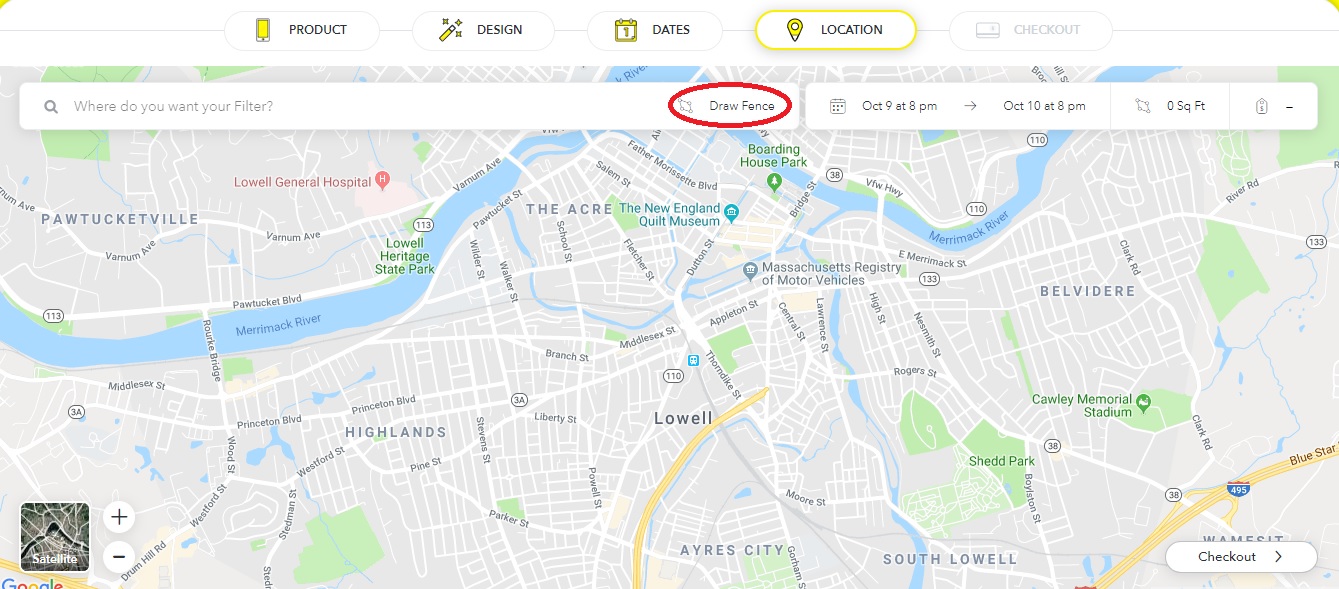
 From here, you can choose to create your filter, and then customize it however you want. You can either upload your own art or use the filter creator that Snapchat has itself. Afterward, you can choose the dates and location of the event. Make sure to press “Draw Fence” and then click the points you want the location to be in.
 You do (unfortunately) have to pay to create your own Snapchat filters. However, thankfully, it’s a relatively cheap cost, at roughly $5 per 20,000 square feet. So small events won’t end up paying a fortune, but larger ones may be a bit pricey if you don’t have a business paying for the expense.
Note that it may take a bit for Snapchat to process your request, since they have to make sure that the filter is appropriate.


How to create a geofilter on Facebook
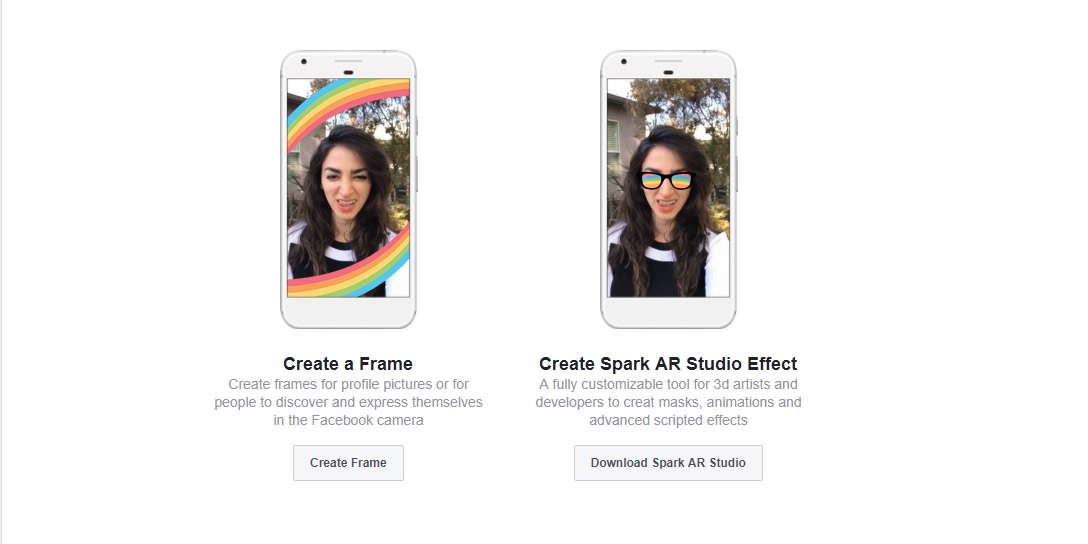
The process for creating frames on Facebook is similar to Snapchat. First, you’ll have to go to Facebook’s frame studio page, that gives you roughly the same options as Snapchat did. Choose “Create Frame” to get started.


Unlike Snapchat, you’ll have to create your filter outside of Facebook before being able to upload it. Afterward, you can name, give it a specific location (using Facebook’s “place” pages), and create keywords for people to search for it online. Once you’re done, you can publish the filter and make it available for anyone to use. Also, unlike Snapchat, these filters are completely free!
How to create a geotag on Facebook and Instagram
Most people know how to geotag on both of these sites by simply using the “check in” or “add a location” features. However, creating your own geotag can be a bit confusing, especially on Instagram, since you can’t create one on the site itself.
Thankfully creating a geotag on Facebook actually creates one for Instagram as well. You can do this by pressing the “check in” button on the Facebook mobile app (it won’t work on the browser version of the site). From here, type in the name of the location you wish to add. Then press “add ‘Location name’” at the bottom of the “places” list. From here you can fill in details about your location, such as what type it is, and where it’s placed. Once this is done, you’ll be able to publish the location to both Facebook and Instagram for future use. Note that the location information becomes public after you publish, and you won’t be able to edit it in the future.


Comments
Post a Comment