Tutorial Hacking Facebook Using Phishing Method, Fake Facebook Website.
 |
| Usman Tech Breaker |
Level : Medium – Hard
Before This tutorial i wrote a tutorial about hacking facebook :
1-Tutorial Hacking Facebook Using Phishing Method, Fake Facebook Website.
There's some readers ask about phishing technique. This tutorial continued from my last tutorial about "Hacking Facebook Password Account" in phishing section.



1-Tutorial Hacking Facebook Using Phishing Method, Fake Facebook Website.
There's some readers ask about phishing technique. This tutorial continued from my last tutorial about "Hacking Facebook Password Account" in phishing section.
What is phishing?
According to Wikipedia :
Phishing is a way of attempting to acquire information such as usernames, passwords, and credit card details by masquerading as a trustworthy entity in an electronic communication.
To make it simple, let's say that facebook phishing is a way to make and create fake facebook website according to the real website for negative purpose, such as : stealing credentials, data, etc.
Okay…to make it more simple, let's start the tutorial….hands on will make us understand better isn't it?  LoL
LoL
 LoL
LoLRequirement :
1. facebook offline files (you can view our previous tutorial number 2 in link above)
Step by Step Tutorial Hacking Facebook using Phishing Method :
Before you start, we wrote this is just for education purpose and we're not responsible if someday you use this for negative purpose and FBI or Interpol looking for you as a criminal and jail will be ready for you. !!Please remember this!!
1. In this tutorial about Hacking facebook using phishing method we will use not-allowed.com as free web hosting service, but you can choose the other most suitable with you.
Update!! : we got a comment from hosting representatives that you can't use this hosting for phishing purpose in case you use it for phishing, they will suspend and terminated your account..so we remove the link, and you can just find the suitable another free hosting. 


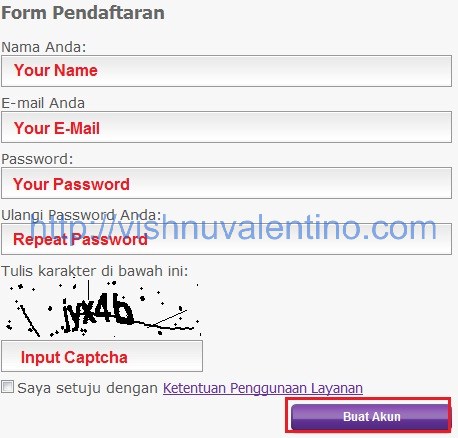
Click "Buat Akun" on the top right side page, You can register your account there.
2. The next step you can fill the required data there.

3. After step 3 they will send you an activation link to your e-mail and your account will be activated. If your account already activated you can click on "Beralih" button to go to your hosting control panel.

4. Inside your hosting control panel, on "File" section click "File Manajer 1"(file management) to upload the file.

5. Inside your file management, click on "public_html" to go into your web root folder.

6. Inside public_html folder, you can upload all the data here so it can be accessed worldwide. In this page you can choose which upload method you want to use, there's "Upload", "Java Upload", "Flash Upload" you can choose which one most suitable for you. Don't forget to ZIP all of the content before uploading so it can be extracted later.

7. The next step is extracting the data we already upload on last step. Tick the ZIP file and click UNZIP to extract the data.

8. Here's the data after all the data extracted.

9. Yep everything has been set up correctly until this step. The next step we need to configure the database. Go to this link http://cpanel.not-allowed.com/index and click on "Tool Penting" section and click "Database MySQL"

10. The next step you need to fill in your database information in this page such as database name, databaseusername, and so on…

When you finished, click "Buat" button to create the user and database.
11. Now you will have a new database and new user, you need to go to your "phpmyadmin" window by clicking the link to upload the database. Don't forget the "Host MySQL" address, my address was mysql.not-allowed.com.

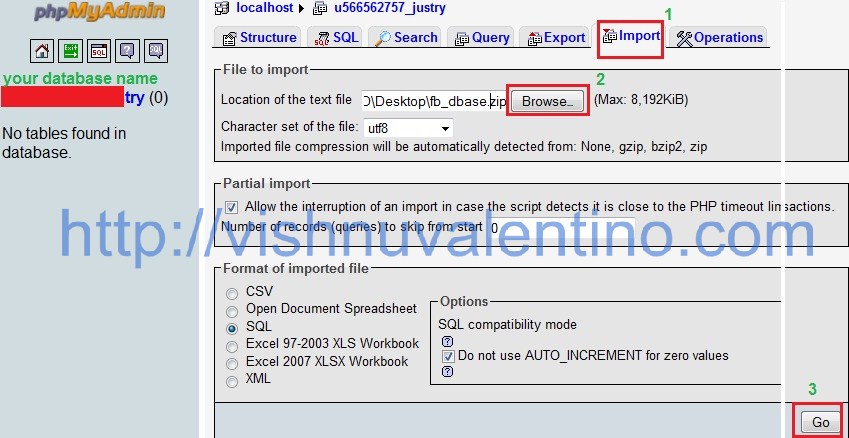
12. After everything finished, now in phpMyAdmin window, click on "import" tab. Don't forget to download the database file below
and then click browse and upload the database you've just download before, and click "Go" when finished.
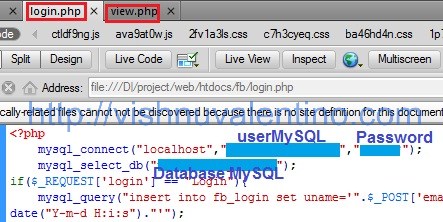
13. When you finished everything, now time to modify login.php file and view.php file. Open that file using your favourite text editor(such as:notepad, dreamweaver, gedit, etc).

Don't forget to change the "localhost" to address that described on step 11 (your configuration with our configuration maybe different  )
)
 )
)
When you finished edited that two file, you should upload that file and replace existed file (repeat step 6).
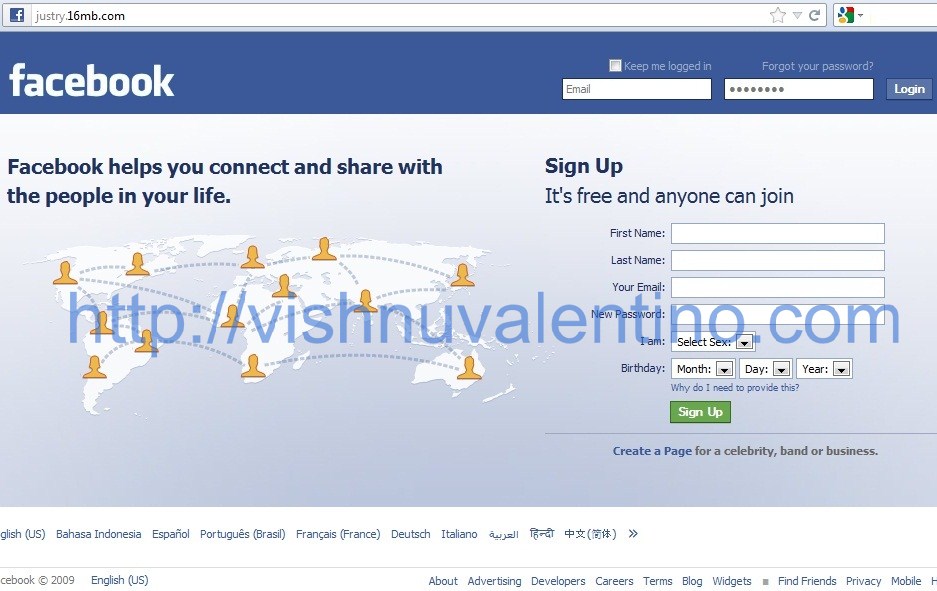
14. Well done! now you can check the address. Here's our screenshot when access the page.
15. When user input their e-mail and password, the fake facebook website will forward it to the wrong passwordpage like this.
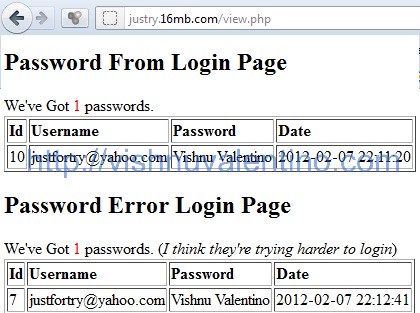
16. To view harvested e-mail and password, you can check on http://your-website.com/view.php.

Countermeasures :
1. Look carefully the address when you open a website that ask for your credentials. It's better you type it by yourself 

2. Change your password (and all the same password:e-mail, twitter, etc) ASAP when you know this attack happen
4. Install URL advisor(usually this you can get from antivirus for free) but not too effective.
Hope you found it useful 



Comments
Post a Comment